
GateWay-网关
GateWay
什么是GateWay
基于Spring 5.0 、SpringBoot 2.0和Project Reactor开发的高性能API网关组件
API网关
API网关是一个中间层,集中管理、保护和优化API请求与响的通信。
API 网关提供了安全、流控、过滤、缓存、计费以及监控等 API 管理功能,使得系统更易于管理、更安全、更高效,并提供了更好的可视化和分析能力。
GateWay的主要概念
Route(路由) : 由一个 ID、一个目标 URI、一组断言(Predicate)和一组过滤器(Filter)组成
1.地址映射转发:
http://网关ip:网关端口/服务名映射/xxxx?xxx=x
2.服务名映射/xxxx?xxx=x 转换成对应的微服务的请求地址,再把请求发出
Predicate(断言): 对 HTTP 请求进行匹配 -> 判读用哪一条路由
Filter(过滤器): 对请求进行拦截和修改 -> 插件机制 ,责任链模式组装,aop增强机制
GateWay开始
GateWay的搭建
引入依赖
1 | <dependency> |
配置yml文件
1 | server: |
写启动类
启动服务,将服务注册到nacos上,并在nacos的服务列表查看是否注册成功
1 |
|
路由配置
1 | Spring: |
日志文件配置
启动类配置虚拟机参数,启用Reactor Netty HTTP服务器的访问日志
-Dreactor.netty.http.server.accessLogEnabled=true
1 |
|
测试结果

GateWay负载均衡
引入依赖
1 | <!-- 引入riboon,客户端保存服务列表信息 --> |
修改application配置文件
1 | Spring: |
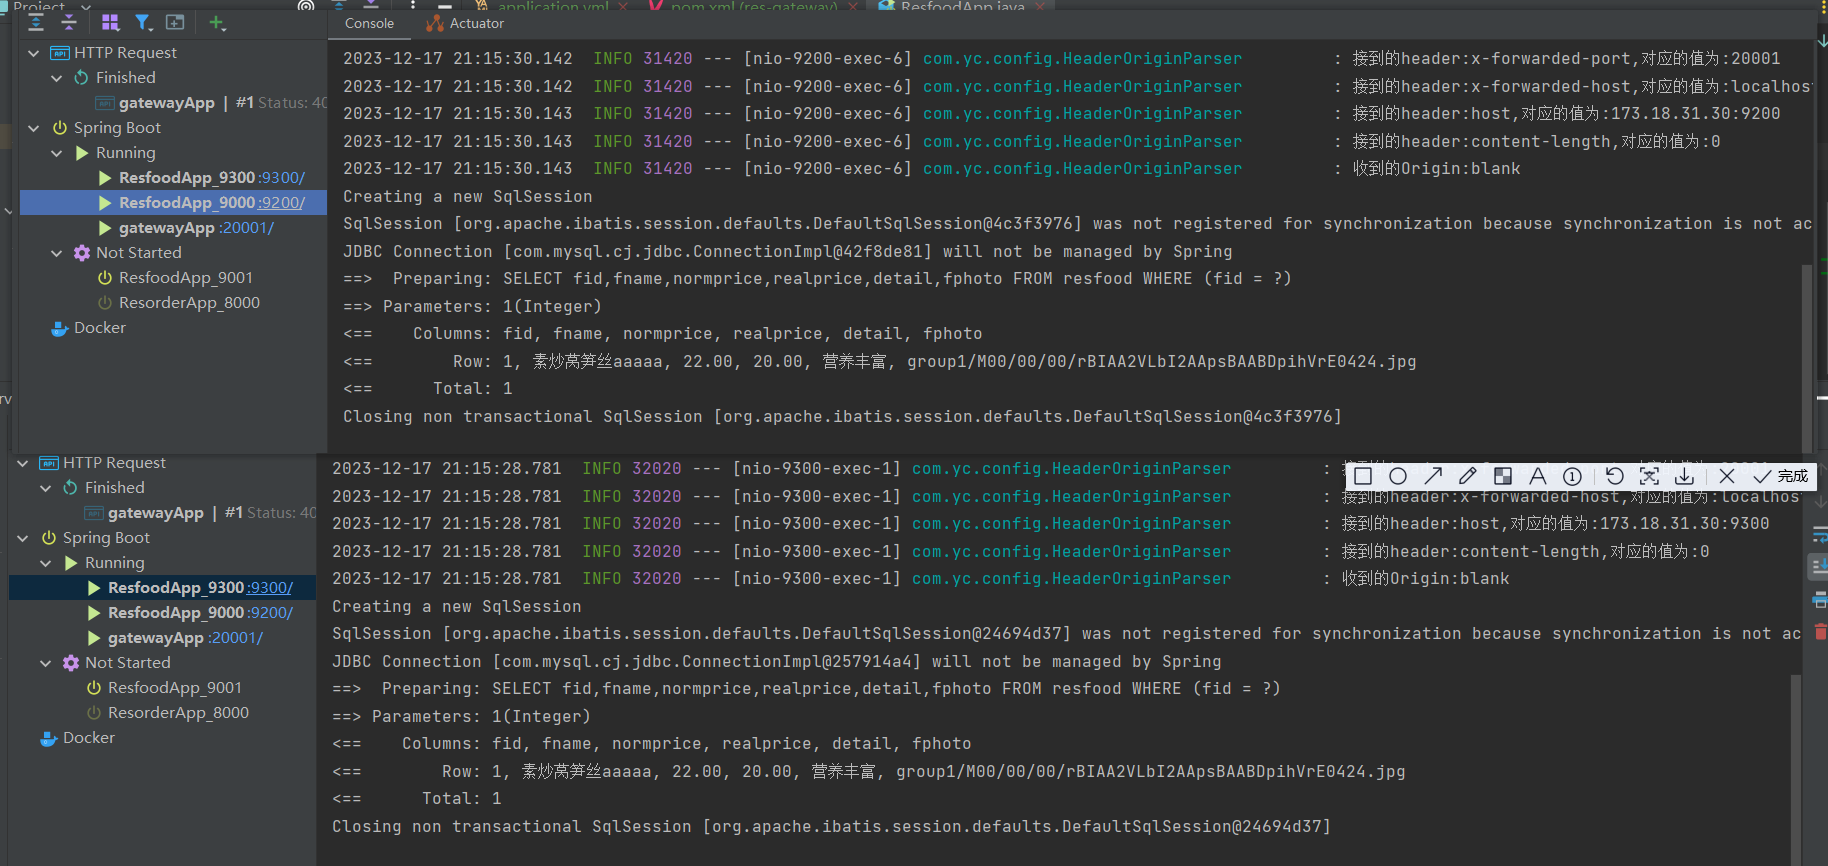
测试
开启resfood服务,并启用多个端口,这里给该服务启动了9200 、9300两个端口用于负载均衡,重复访问两次localhost:20001/resfood/findById/1,查看负载均衡结果
actuator的路由操作
导入actuator的依赖
1 | <dependency> |
actuator配置文件的配置
1 | management: #通过 actuator暴露此服务的管理端口 |
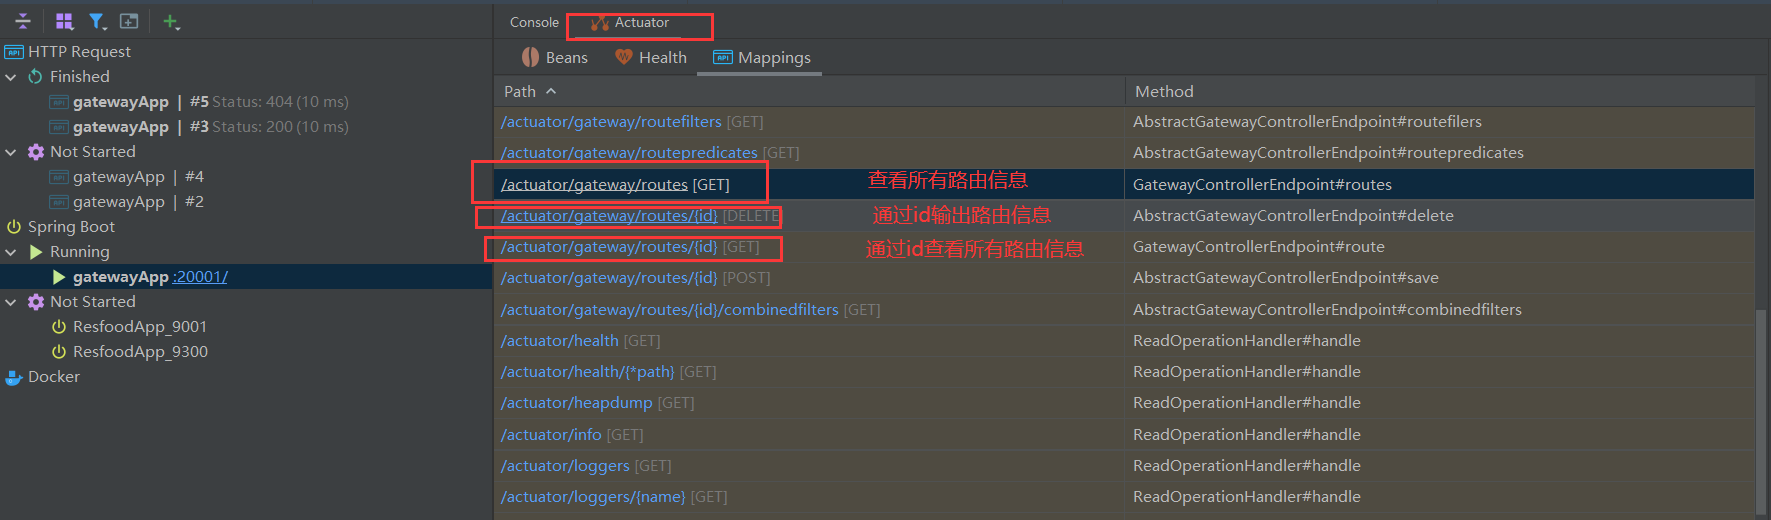
对actuator路由的操作
GateWay原理
谓词工厂-构造模式
根据输入(条件)生成一个匹配规则对象,创建型的设计模式(例: 单例,构造器builder-流式方案创建,简单工厂,抽象工厂)
谓词 -> 判断
result: true/false
输入数据: 一个/多个
谓词接口: ->将if-else的判断转换成一个对象
2
3
4
5
6
7
8
9
10
11
12
13
14
15
16
17
18
19
20
21
22
23
24
25
26
27
28
29
30
31
32
33
34
35
36
37
38
39
40
41
42
43
44
45
46
47
48
49
50
51
52
53
54
>public static void main(String[] args) {
>// 使用Predicate过滤集合
List<String> ns = Arrays.asList("Alice", "Bob", "Charlie", "David"); //创建 不可变集合
List<String> names=new ArrayList<>( ns ); //转为可变集合,以便后面使用 removeIf删除元素
>// 定义一个Predicate,判断字符串长度是否大于3
Predicate<String> lengthPredicate = s -> s.length() > 3;
>names.removeIf(lengthPredicate);
>System.out.println(names);
}
>//removeIf底层
>//names("Alice", "Bob", "Charlie", "David")
>//filter: s.length() > 3
>default boolean removeIf(Predicate<? super E> filter) {
Objects.requireNonNull(filter);
boolean removed = false;
//names数组的迭代
final Iterator<E> each = iterator();、
//迭代names数组里面的元素,看看是否满足移除的条件
while (each.hasNext()) {
//判断 names是否满足filter过滤器的条件
if (filter.test(each.next())) {
//移除满足条件names元素
each.remove();
//判断是否删除成功
removed = true;
}
}
return removed;
>}
>//所以这里输出的结果为Bob
><!--2-->
public static void main(String[] args) {
//TODO: Predicate<T> and 方法使用
List<Integer> list = Arrays.asList(1, 2, 3, 4, 5, 6, 7, 8, 9, 10);
Predicate<Integer> predicate1 = x -> x > 3;
Predicate<Integer> predicate2 = x -> x < 9;
//底层实现 -> 多个条件(断言)用and进行连接
//流式调用builder的设计模式
List<Integer> collect = list.stream().filter(predicate1.and(predicate2)).collect(Collectors.toList());
System.out.println(collect);
>}
>//result 4,5,6,7,8
><!--3-->
//多个参数
>// 使用BiPredicate判断两个字符串是否相等
BiPredicate<String, String> equalPredicate = (s1, s2) -> s1.equals(s2);
System.out.println(equalPredicate.test("Hello", "Hello")); // true
System.out.println(equalPredicate.test("Hello", "World")); // false
}
示例
resgateway
2
3
4
5
6
7
8
cloud:
gateway:
routes:
- id: resIndex
uri: lb://resIndex
predicates:
- Path=/**html的路径中
resfood/findByPage?pageno=1&pagesize=5是相对路径
访问浏览器index.html http://localhost:2001/index.html
相对于浏览器的地址
gateway /resfood/**
http://localhost:2001/ resfood/findByPage?pageno=1&pagesize=5
 wechat
- zhifubao